Thursday, May 12, 2016

Another Travel Bag, Part 1

Oh, wait.  That would actually mean I'd have to have blogged about the FIRST one.  Which I totally meant to do, you know.  It's just that I probably finished it just in time to throw everything into it as I was running out the door to the airport, which is usually when I finish sewing anything that has me as the intended target.  Most likely, I was trimming threads in the car at o'dark-thirty in the morning on the way, too.  Story of a seamstress's life - you sew for everyone BUT yourself, as if you don't deserve any kind of priority over - well, over anyone.  

I try to fool myself by keeping a running mantra in my head..."gotta have something to wear/carry/show on the road/in the air/at the hotel that is a good example of what I can create, just in case anyone wants to order one while they are crushing me into a small, inconvenient package in the middle seat..."

I've heard legends whispered of sewers who carry their own bags, wear their own art jackets, or other to-die-for sewn goods, who are stalked by sudden, demanding fans requesting to purchase said item off their shoulders.  Which, of course, the sewers do - after weak protests of "I wasn't planning on selling this one; I would really rather not have to carry my goods in a plastic trash bag all through the trip."  Not a single one of those stalkers/customer wanna-be's have ever followed me anywhere.  But I can still dream, can't I?  So I sew something for myself once in awhile, usually something eminently practical and useful.  Still haven't gotten brave enough to make art-to-wear (those pitiful throngs of people who will someday surround me in an airport will just have to wait), but I have secret plans.  In the meantime, after I've waxed eloquently about how my old, faithful tote bag is on the verge of falling completely apart (probably in said airport, and then those throngs of people will be pointing and laughing - not the effect I'm going for, you understand), I hurriedly throw whatever is in my stash together to make a bag for the trip.

Thankfully, my stash IS legend.  

There is a home dec type store several blocks from my house that sells end cuts and remnants at redonkulous prices, and often gives customers smaller cuts for free.  I will not divulge how many times I've been in this store, but it boggles the mind.  I've swung a lot of clients their way.  They have worked with me many times on supplying fabric for projects for the high school band, and have given me very decent pricing on those huge swaths of fabric, so I like to try to return the favor whenever possible.  My poor husband has been tasked with building shelving in the garage now to house all of the umpty-something plastic crates of upholstery and home dec fabric I now own, most of it earmarked for various projects, not all of them what you'd expect.  

But, hey - what's a good seamstress without a huge stash?  Because you just never know when that one client is going to ask for something you just happen to have...and if you have it in stock, you won't have to drive - again - to the fabric store.  (Yeah, right.)

So, this is what happened the last time I traveled.  I was truly annoyed at the mismatched, stained, laundry-shrunken tote bag that I own, having used it since the boys were really little (they are 20 and 24 now).  It could be stuffed with toys, plush animals, books, games, snacks, drinks, and occasionally even a magazine for mom that somehow made it back home completely unread.  You know, THAT tote bag.  We all have one.  The one you have to duck awkwardly down to be able to reach, shoved all the way under that seat in front of you, because your kid suddenly remembers he HAS to have that book/toy/plush animal RIGHT NOW, and then the person who is IN that seat in front of you simultaneously decides it's the perfect time to recline their seat.  And there you are, so graciously providing that passenger with plenty of extra rear seat support.  The people across the aisle are wondering why on earth you're madly waving your arms around while jackknifed under the tray, which has dropped down to bang into your upper shoulders, but they're another story. 

I digress.  Like I said, the boys are older now and can carry their own stupid stuff their own carry-on items, so I decided to make myself a new tote that had plenty of pockets for every possible contingency, one that actually MATCHED my rolling suitcase (what a concept!), and had one thing that none of my tote bags have ever had - a strap or other means to attach it to the rolling suitcase I can't live without.  Ever been running through the airport, desperately playing "Which Gate Are We Leaving From NOW?", only to have one or two of your wheels suddenly decide it was that gate you passed, two aisles back?  Even carefully and lovingly stacked on top of your suddenly swerving suitcase, with the handles wrapped painfully around your knuckles, that darn tote manages to dutifully swing itself overboard, emptying half its contents in the process. We won't even talk about the physical therapy for the shoulder that ensues.

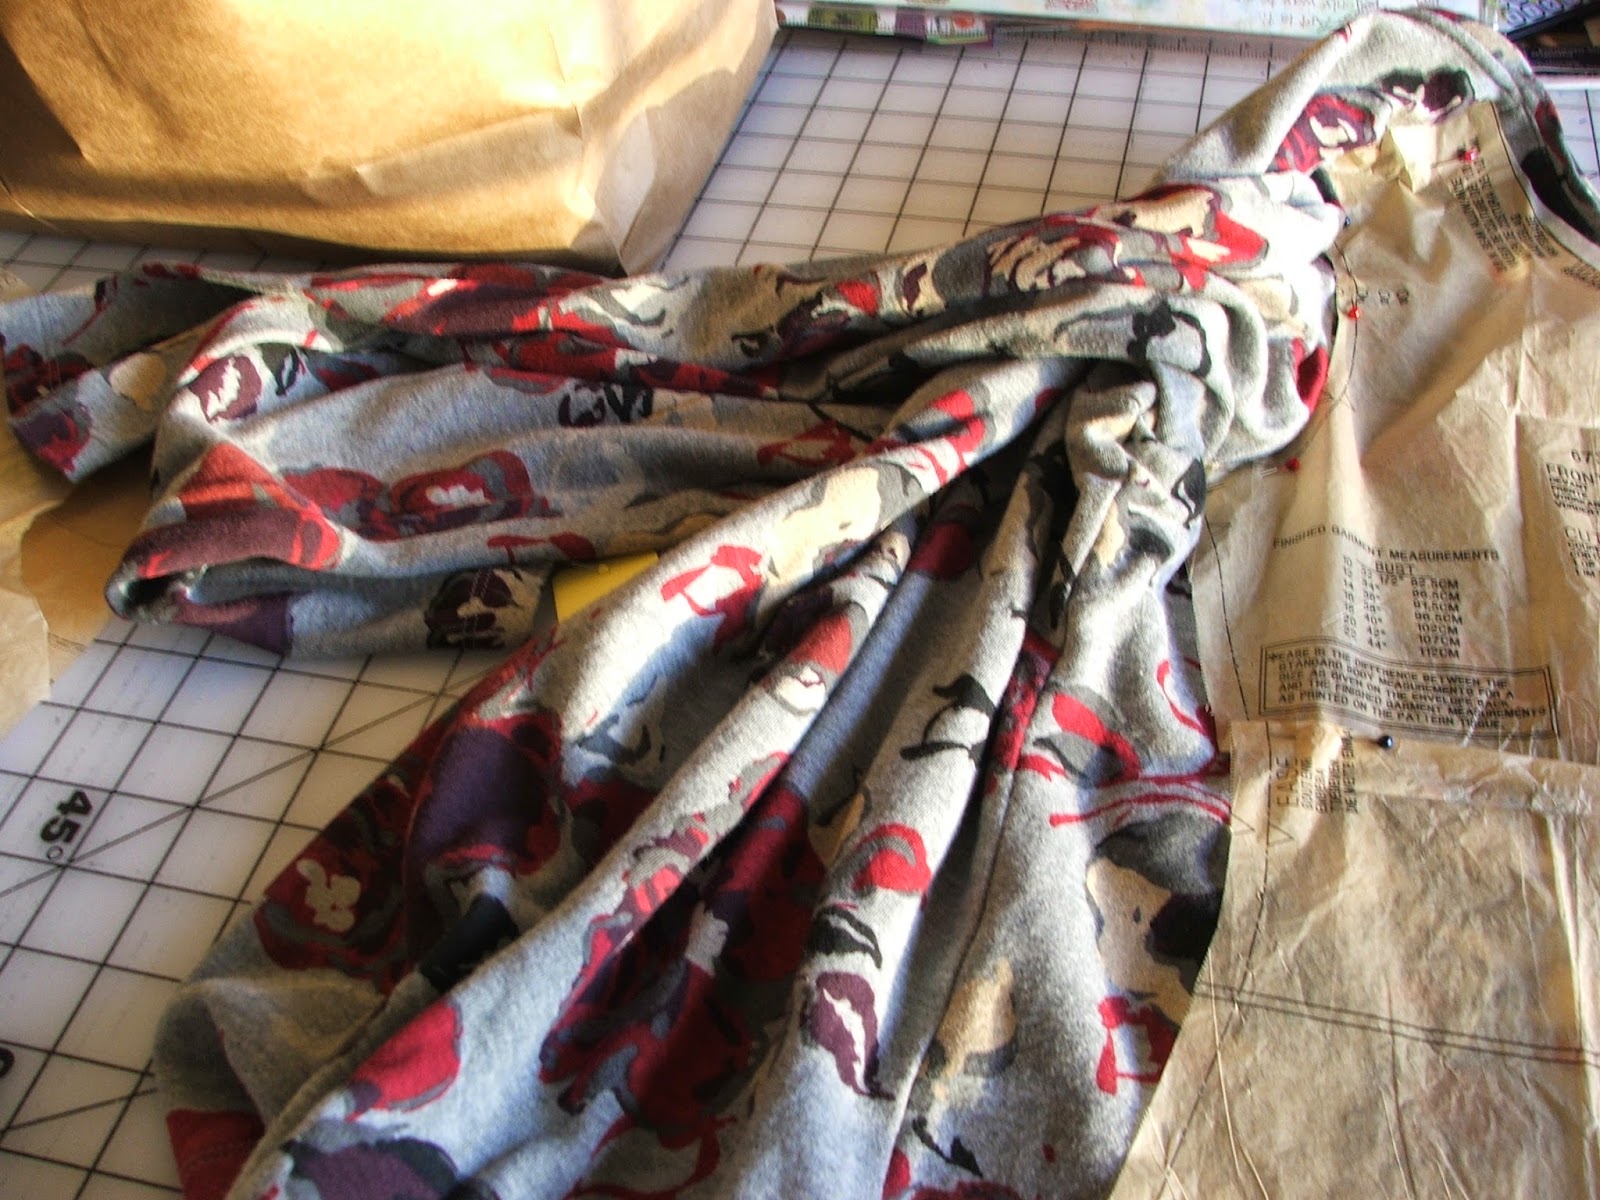
Enter Butterick B5866.  I picked this up at Joanns one day during one of their Butterick pattern sales, and promptly filed it away for future use.  Which I'm glad I did, as it is currently out of print.  But I loved the idea of using several coordinating fabrics for a fun look.  So I dove into my stash, and came up with about three that I thought would go with my beloved burgundy colored suitcase, and might actually impress someone in the airport.  The pattern was pretty straightforward, though I might change up the strapping the next time - it was awkward to carry over the shoulder (not enough room through that strap opening), and I'm so short that any straps for hand carry usually mean I'm dragging the thing across the floor like a Neanderthal.  Or hoisting it up higher, which means a sore back and shoulder (are we seeing a pattern here?), and a very crabby trip.  I remembered something about a pocket that changed into a handle flap that Nancy Zieman had blogged about years ago, and decided that would be the perfect thing to put into this bag.  

The Travel Bag (and suitcase)

Three different home dec fabrics.  One security strap to make sure the stuff inside doesn't go flying unexpectedly outside. Two exterior pockets, easily accessible for TSA, my I.D., and my tickets/itinerary.  Two interior pockets (see below).  

And two different color zippers.  Because it was probably 10 PM the night before, I wasn't about to try and find a fabric store open to find another matching zipper, because then I wouldn't get the darn thing finished in time, and it's called "raiding your stash," thank you very much.  But it's also probably why I wasn't mobbed by stalkers demanding to order one in the Houston airport during an 8 hour flight delay.  Either that, or it was the frightening hurricane pounding the tarmac outside.  Just sayin'. 

Inner calm.
I mean, Inner Zippered pocket, and Inner Slip Pocket.

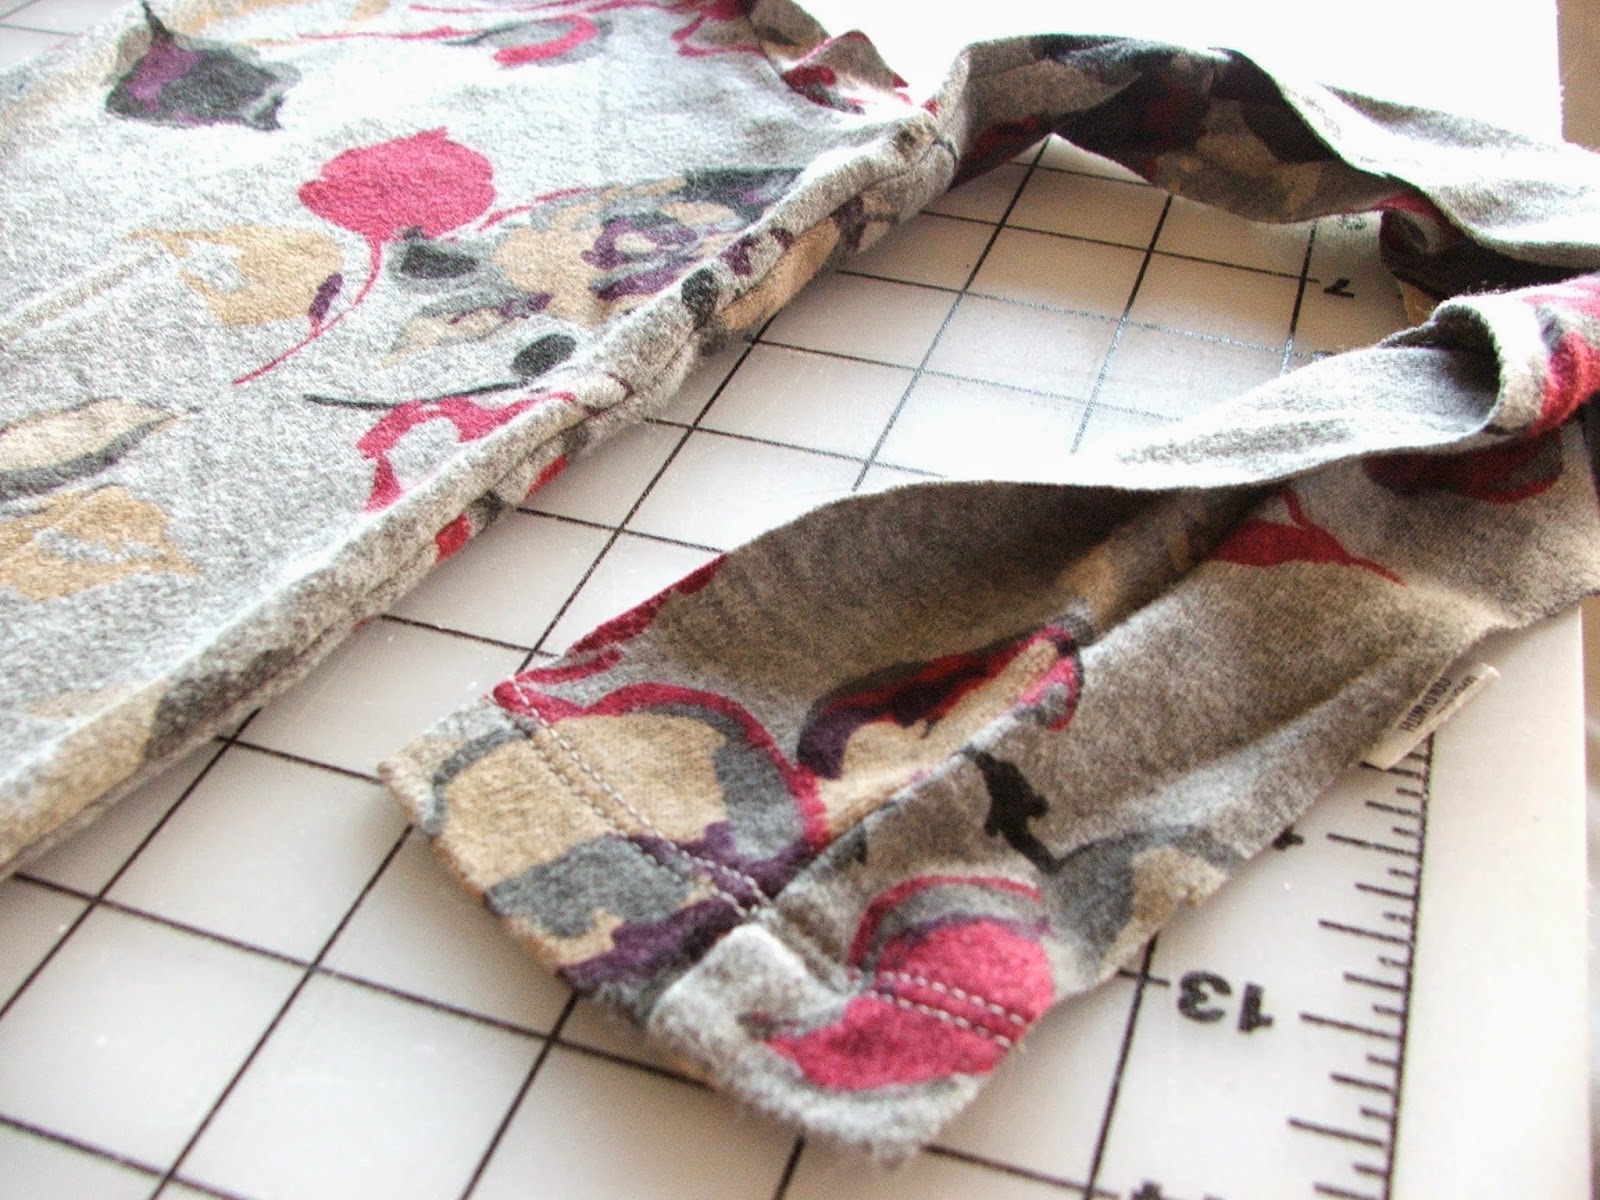
(Insert whatever ta-Dah! type music you usually play in your head, here. Go ahead, I'll wait.)

Here it is: the Nancy Zieman handle flap.  I chose not to put a zipper into the bottom of the flap to make it into a usable pocket, because - ahem - I was already rather zipper challenged enough as it was.  And I couldn't for the life of me figure out why on earth I'd want a pocket that converted into a flap.  I mean, if it's a POCKET, I want to use it as a POCKET.  I'm all about POCKETS.  And stuffing things into them.  And not having to find another place to move those stuffed things into when I suddenly decide to convert the POCKET into a HANDLE FLAP. So it's open - bare ankles all the way, all the time.  And boy, did it come in handy while running through the partially demolished hallways, especially when tripping over the partially demolished flooring strips.  That bag stayed right where it was supposed to, on top of that suitcase, attached to the handle.

All the way down to the floor, which is where we had an impromptu little meeting.

And the throngs of people were indeed, pointing and laughing.

But the tote bag stayed put.

Coming up: Another Travel Bag, Part 2


Saturday, April 16, 2016

It's Been So Beary Long!


My smirk-y buddy.
This is me, in bear-form.


 Today's post has been a very long time in coming, and believe me, no one regrets that as much as I do.  Life has been like life always is - random patches of super busy-ness (especially before Christmas - something about that time of year almost always makes people think of giving something hand-made/sewn/embroidered - at the last minute), dotted with periods of Oh eM Gee, I think I need to find a job elsewhere because WHERE HAVE ALL MY CLIENTS GONE?
(Extra bonus points if you sang that in your head to the tune of "Where Have All The Flowers Gone?")

But things always seem to balance out the way they should.  My home can get rather messy during the peak seasons, and I go into a panic when I have large stretches of time when the work is sparse (instead of thinking, "Yay! I've got free time so I should get caught up on housework!" - do people really even think that way?  I must be missing an internal Suzy Homemaker switch or something).  I've thought about working outside the home, giving up on sewing altogether (which happened immediately after working on the most difficult bridal alteration I've ever encountered - and it's the only time in the last 40+ years of sewing that I've ever entertained the notion, if you'll pardon the seamstress pun), but even after a day or so of not sewing, I seem to navigate back to it in short order.  Must be in the DNA or something.

I've also been working all this time, bit by bit, on learning to better my photography.  I've been told (by sources that I really admire and appreciate) that my skills have vastly improved.  Part of that was due to purchasing a new-to-me camera last summer.  Part of it was due to buying a couple of how-to manuals that stressed that the main thing about learning to be a better photographer involves taking a TON of photos - then deleting most of them.  Thanks to the digital age, this isn't as painful as it sounds.  The majority of it is due to just getting my rear in gear and getting the camera out as often as possible, even for seemingly random and unexciting shoots.

Product shoots count, you know.

The writing, though - that took a back seat behind figuring out what, if anything, I was qualified to do outside the home should I be able to find work at all.  And then nursing my son back to health after he broke his foot in a motorcycle race.  And still working on sewing client jobs while trying to sort out the homemaker/employee/nursemaid thing.  Add in several recent deaths, both in the family and among friends.  In other words, Life happens.  I have missed writing - I think I just lost my mojo for awhile.  And I never really know if anyone is reading or not, other than by stalking my pathetic blog stats.  I figured that since this post so strongly related to my last post, it would be a good way to re-enter my little corner of the blogosphere.  So here is today's story:

I was approached recently by a booster parent of our high school's color guard team.  Every year, the team gets together and honors the soon-to-be graduating seniors and team captains by giving them a farewell luncheon with gifts, usually during what they call final retreat at championships.  This year, the girls had the idea to have replica outfits made for some stuffed bears to give to the seniors.  They chose the outfit they liked the best from one of the previous seasons, and asked if I could duplicate the dresses for the five bears.

It's not every day you get to practice draping skills on a stuffed animal.  But that's how the process starts.  The booster parent borrowed one of the original dresses; I then took some leftover draping scraps from my most recent foray into draping/pattern drafting (a wedding job that I might put in my next post) and proceeded to fashion the bodice for the bears.  This takes some effort and thinking - mostly trial and error - especially because the bears are so, well, squishy.  But that's actually a good thing, as my drafting mistakes are less evident because the bears have a tendency to give.  In a squishy way.

Draping the front bodice, while someone whispers sweet nothings in her ear...or gossips.  You never know with bears.


Next step: drafting patterns from the finished draping/fitting process.
Choosing the lace, fabric, and trims that would most resemble the out-of-stock original fabrics. This was the most difficult part of the process.  It can't match exactly, because it's so small scale.  But it can't be too different, either - because then it's not reminiscent enough.


The original dress (in the background) with the first draft.  This draft was a big nope - other than the color and the scale of the lace being okay - but not acceptable as is, since now I notice that the circle skirt that I cut for the bears doesn't look enough like the gathered skirt of the original. Looks more like a t-shirt or something - needs more gathering.  This becomes a problem, as the original lace was stretch lace, softer, and draped much more than the only lace in town that was the right color match - it wasn't stretch, and wouldn't softly gather the same way.  Argh.


Round two: after consulting with the client, then drafting a semi-gathered skirt, the miniature dress is starting to look more like the original.  And cuter, besides.  More like a dress, less like an oversized muscle-shirt.  Much less argh.  And then on to cranking out the other four dresses, assembly fashion (that's another seamstress pun - just in case you didn't pick up on that).


One of our five finished, lovely friends, modeling the back of the dress.  The zipper was purely for show, to resemble the original dress.  Ever tried setting in five  six two-inch zippers?  Because - whoops!  - I got a frantic text the day these were all due, looking for a sixth costumed bear to round out the selection.  The girls decided to give one to the coach they'd been working with for several years, even though he had moved on prior to this season.  Nice gesture.  Just means rearranging my calendar a bit.  And diving into the leftover scraps, hoping against hope that there will be enough to duplicate one more skirt...a few more panels than the others, but with all the gathering it was ultimately unnoticeable.  (And no "argh.")


The sixth bear, happy at the top of the pyramid/bear pile, 
and finished just in the nick of time.  Fully skirted, too.


Client was very happy, and she went out and bought presentation boxes like you'd find a collectible in at the toy store.  Pretty snazzy - hope I can get a shot some day of the finished packaging!

Sunday, April 12, 2015

A Lovely Remembrance

I wanted so badly to post this sooner, but since this was a surprise that the client wanted to give as Christmas gifts, I couldn't until after the holidays had subsided.  Figured Super Bowl Sunday was far enough out...then Valentine's Day...then St. Patrick's Day...then Easter...

This client was referred to me via a mutual friend.  His mother had passed away about a year ago, and the family was understandably having a difficult time.  The grief counselor suggested having something made from some articles of her clothing, and commented that a bear was usually a good choice as it could be hugged as needed.  My client showed up with 6 beautiful Gund bears and a bag full of his mom's clothing in tow, in colors she had loved wearing (and pieces that held some sentiment for his dad, his siblings, and himself).

Clothing, and trimming, and bears - Oh, My!

I had to think about this for awhile, since I'm not a master pattern maker by any stretch of the imagination.  Suddenly it hit me - I have several books filled with baby patterns that I've bought over the years, and with a little tweaking, they might just fit these bears.
LIGHT BULB MOMENT!
I started off small.  I used one of the Henley t-shirts my client brought for me, looked around Pinterest for a few ideas on bear clothes (where there is a decided plethora of frilly & silly bear clothing - and a metric TONNE of Build-A-Bear garments that leave a lot to be desired); I decided to cut the shirt down to size and draft a pattern from it. Most of the patterns I found on the internet didn't account for any kind of body shaping (especially in the neck/shoulder areas).  Shaping for a bear is hard - that meant a t-shirt had to fit over a big head and around a thick neck, which leaves little room for a shoulder area, which is proportionately smaller.  It took a little finessing, but I was pretty happy with the results.  The simple elastic waist pants took a bit of fudging, too - thankfully, baby patterns do take a padded bum into account!  Don't get me started on the big bear feet, though...

After completion, I sent this pic in a text message to the client that read:
"In the beginning, there was a t-shirt.  And the t-shirt fit.  And it was good."

He loved it.

One of the blouses, cut as close to the original seams as I could get, in order
to save as much usable fabric as possible.

Matching blouse fabric with t-shirt fabric I culled from my
remnant bins.  I buy these when I see them at my local fabric store -
they are usually less than a yard apiece, but you'd be surprised how
handy they are to have sometimes.

Matching up tops and bottoms, deciding which ones would be
more girly and which ones would be more boyish.  Some turned out
to be in-between-y.

I should totally trademark that last word.
I had so much fun planning, matching, and making these, that I couldn't help but continue the party over to the photo shoot.

I had so much fun, I ended up stripping the threads on my camera's tripod connector.  OY.


Two of my favorites - especially the salmon colored one.
("PSST - I've got a secret to tell you!")

This was made extra special by taking advantage of the pocket placement on the front of
the original blouse, which then became the back pockets on this pair of overalls.

Okay, I'm beginning to sense a pattern, here.

(GROAN)

You can't tell that this is my favorite of the group.

Not.  At.  All.

("...99, 100!   Ready or not, here I come!")
Of course, then the ridiculous fashion photographer wannabe in me took over...had to make sure I got their good side, you know.

Sigh.  Still my favorite.  

Mr. Casual

His close-up.
Then, the prop-master in me got all fired up again.

I wuv my kitteh.

Hands down the hardest outfit of all - lots of detail work, but
it was totally worth it.
Believe it or not, this is a straw hat we found at some dollar store, and
it's been sitting on top of a glass frog lamp my husband bought me years ago
as a gift.

The frog didn't seem to mind lending it out.

TINY POCKETSES!

Another Henley and pants combo.
This one reminded me of my own mom for some reason.

And here we are, back to the starting point again.  

The Henley crew.

Family portrait.  

I ended up sending all of these photos to the client.  In addition to presenting a bear to each of his siblings, his father, and himself, he made a little documentary about the bear project which included photos of the clothes, the bears, the presentation, and pictures of each recipient with his or her bear.  In the photos he took of his siblings and his dad holding the bears, you can see some of the photos of his mom in the background - and in one or two, she was photographed wearing some of these garments in life.

One of the most poignant and rewarding projects I've ever been asked to help with.


Thursday, June 26, 2014

Why Can't I Be Different From Everyone Else?

Cruising through my reading list this evening, after almost a week of being unable to access it (thanks, Blogger), I came upon two posts that were written by two sewing bloggers.  One I've admired for a long time (Sarai from Coletterie, and one I've just recently discovered (Jody Pearl from Sew Outside The Lines).  Both of them touched on things I've been mulling over myself in the last year while on hiatus from writing my own blog.  Primarily, the questions/considerations center around 1) why do I sew? and 2) what is my focus, or what should it be?

Sarai recently did a series on her blog about streamlining your wardrobe by considering what your style is, or what you would LIKE it to be, and outlined steps you can take to get there.  From the comments she got during and after the series, it sounded like a lot of us are floundering when it comes to our personal style, so I'm no exception.  But I end up sewing so little for myself because I have had to take in so much sewing for others, just to help make ends meet.  So, I end up lurking around local thrift shops, scouring for duds that I can spruce up, remake, refashion, tailor, or use for parts & fabric.  And those pile up around me also, since I'm pretty tired by the end of my sewing day (4 hours most days, six if I can really push myself - check out the National Fibromyalgia Association website for details about why - it's too much to explain here).  It's not that I ever run out of ideas - anyone who's haunted my Pinterest board about refashioning knows that, LOL - I just run out of steam.  What little steam I have, I have to devote to the sewing that brings in income.  Sigh.

I love helping out by taking in sewing, but I've given some really serious thought to backing off from that, because I miss - I REALLY miss - sewing for the creative outlet that it brings, whether that's sewing from scratch, or remaking something to make it my own (refashioning).  I believe in reusing and repurposing things, and have done that for years.  What I didn't realize is that those concepts are part of a broader philosophical notion known as wabi sabi.  My favorite quotes from Wikipedia about it:  "If an object or expression can bring about, within us, a sense of serene melancholy and a spiritual longing, then that object could be said to be wabi-sabi."  (Juniper, Andrew, 2003.  Wabi Sabi:  The Japanese Art of Impermanence.)  And, "Wabi-sabi nurtures all that is authentic by acknowledging three simple realitites:  nothing lasts, nothing is finished, and nothing is perfect."  (Powell, Richard, 2004.  Wabi Sabi Simple.)  

Those last three notions really sang to me.  Nothing lasts.  Nothing is finished.  And nothing is perfect.  Really sums up both why I love to sew for myself or create something of my own to offer the rest of the world, and why I love refashioning.  And why I'd love to pursue both of those as an expression of myself (and hopefully, result in unique goods and/or clothing that others would be keen to purchase).

Sarai had a checklist on her post, offered as thinking prompts, that I have copied and put above my desk to help me pursue exactly WHAT I want to be saying, both to myself and to the world:
  • Who am I?
  • What am I like?
  • How do I want others to see me?
  • How can I express myself in a way that feels true and creative?
  • Why can't I be different from everyone else?
  • Why do I have to take myself so seriously?
I will be devoting some serious thinking time to pursue what my goals are for developing my personal style and the style I would like to present to others.  In the meantime, I stole some time out of my work schedule to remake a top from the Assistance League (the AL).

Here's to being different from everyone else!  :)

I started with an XL knit top  (on my larger dress form) that I snagged when the AL was having their 50% off sale.  Beautiful fabric, and I loved the colors. I try to look for things that have enough fabric or working room in them to remake.  If I can't fit a pattern into the top as it is, often I will cut it up to use in a color blocked shirt. The other thing to keep in mind when you go thrift-store-hopping:  check the condition of the garment very carefully.  Make sure there is no pilling, stretched out areas, discoloration, fading, stains, or holes.  Unless you either want to incorporate that into your look, or you know you can cut around it or over dye it.
 Check out the Reigning Queen of Over Dyeing.
I've folded the top in half at the center front, matching side seams, and now
I've pinned the pattern I'm using to the top, placing the pattern on the center fold and matching the armhole area as much as possible.  When you decide to use a pattern for
your refashion, you need to audition it a bit on the garment, deciding how best to use the existing garment's seams, hems, neckline finish, etc, keeping your finished garment idea in mind.
Sometimes the garment itself dictates what you can do with it.
It's okay.  There are no refashioning police.

Here's a closeup of the pattern up around the neck area.  My shoulders were still
joined, so I have pinned it beyond the seam approximately the distance of the seam width (5/8"), placing it from the center front fold, and not worrying about the neckline - I'm going to leave that as is.


Here is a very blurry closeup of the shoulder/neckline area. I've already cut around the new armhole, being careful not to cut into the sleeve or the sleeve seam allowance. It just barely fit into that area, amazingly. 

Cutting up the sides - I was able to trim out about 4 to 4.5" of excess fabric on each side.  I like this pattern because it is shaped on the sides, where some are just straight up and down from the bust line to the hem.  You can see that the armscye just fits around the existing sleeve curve, right at the seamline.  
And...nothing is perfect.  (Remember my new mantra?)  Here's where you can make an executive decision.  Mine was to use the existing hem, so I didn't worry too much about where to place the lower edge of the pattern.  I was aiming to keep the upper neck/shoulder area as intact as possible instead. 

Now that the front was cut, I folded the back in half, matching the shoulders and the side seams.  Again, I pinned the shoulder of the pattern 5/8" beyond the top's shoulder seam, since I wouldn't be needing the seam allowance, and placed the center back line on the fold of the garment.

Ah.  Here is a better closeup photo - you can see the shoulder edge of the pattern pinned beyond the existing seam.  I continued cutting the sides and the sleeves, leaving me with a front/back which was already finished at the neckline and the lower hems.  All I have to do now I cut the sleeves, set them back in, and finish up.


See?  It's like magic.  Now I won't have to do so much work to have an all new shirt.
Here was what was left after cutting the side seams from the front & back, and the sleeve cap area.  


This dangling part was just about all that went unused - so now I don't have anywhere near the waste I would have, had I purchased fabric to cut this pattern from.   Not bad. 
I had to determine what I needed to use from my pattern, and how it fit into the existing sleeve.  I cut the armhole of the bodice out using the pattern, so I should cut the sleeve cap from the same pattern so they fit together.  If I tried to use the existing sleeve cap as is, you can see there would have been a real fitting issue.


Cutting the sleeve cap to match the cut
armscye of the bodice.
Still had plenty of room left at the
lower edge of the sleeve, and the
pattern length was a bit short,
as it's meant to be a 3/4 sleeve.
 So I used the existing hem and that
left it a wrist-length sleeve.
I know, I know.  I'm a petite person
living in an average-sized pattern world.

I didn't take a photo of attaching the sleeve cap to the bodice, but after I serged them, there was a jog between the sleeve cap and the armscye in the upper bodice area on each sleeve.  That was due to having to pivot the pattern just slightly to get it to fit into the shoulder & neckline area.  I opted to serge along the sleeve (in the upper part of the picture) and then taper from that jog toward the side seam allowance (in the lower part of the photo), cutting off a small triangle.  I may have lost a bit of width in the upper bodice, but since the fabric is knit it wasn't as critical.

BEFORE                                                   AFTER
And here you have it - a shirt that looks brand new, with lovely commercially finished hems and neckline, but tapered and fit to my measurements.  Alternately, I could have just taken the top in all the way from the sleeve hem down the side to the lower bodice hem, but when you do that the shoulder seam ends up falling off the shoulder into the upper bicep area.  Not too flattering - and in a light colored shirt like this, really obvious.


Not too sure about this bringing on a serene melancholy, but it definitely fit the spiritual longing part.  It may not last, it was definitely not finished in it's original state, and it certainly isn't perfect.  But because I don't want to take myself so seriously anymore (I have to create a garment from scratch!  I have to do everything, from start to finish!  And it has to be perfectly sewn!), it fulfilled a need to have a result that feels true and creative, and better reflects the philosophy of wabi sabi.